You know that feeling when you want to scrapbook, but you're too overwhelmed to get started?
I totally get that feeling! So, here is an easy solution to get over the obstacles holding you back from creating beautiful pages!
Here are 4 quick and easy ways to get started on your pages:
Choose Your Photos Ahead of Time - Before your project day, choose photos you would like to use for your layouts
Choose a Page Pattern from the 1-9 or 10-19 design spot categories. These patterns have less spots to fill up. Skip patterns with lots of mosaics or strip cuts in them. If you're not familiar with the pattern gallery - learn more about it here.
Choose only 1 mat color if needed - Only mat key photos, or don't mat any at all! This makes decision making faster.
Use Less Embellishments - You can create your layouts faster if you decide to skip embellishments or keep them simple. Layouts with mostly photos take less time to create.
Want more tips to get you started?
Scroll down for 4 articles from the Mosaic Moments Blog for you!
Close up shots? - When you are first getting started with Mosaic Moments, many of your photos are probably close up subjects. See these 12 layout ideas perfect for those pics!
Easily Embellish with Explore Level Dies - If you would like to start embellishing your pages, our Explore Level dies are easy to use! We gathered 10 easy ideas you can use now.
Make a Quick Layout with Pattern #200 - If you have not used the pattern gallery yet, here is an easy layout to get you started! See Andrea's take and get her tips.
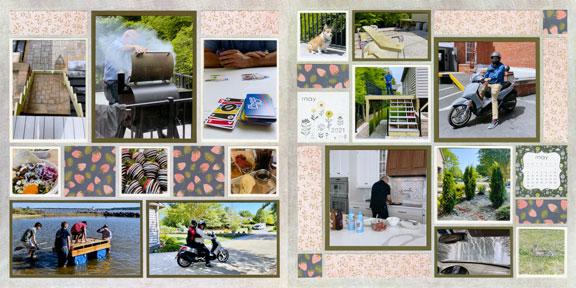
The featured Ombre Collection is perfect for your first simple layouts!
Because it has several shades of color it will really make your page pop without adding more time to complete! The page above is so simple but it looks professionally crafted.
I just love this quick and easy page!
Try using one grid color from the Ombre Collection to create a similar page. You can even use the same pattern and dies as Paije did.
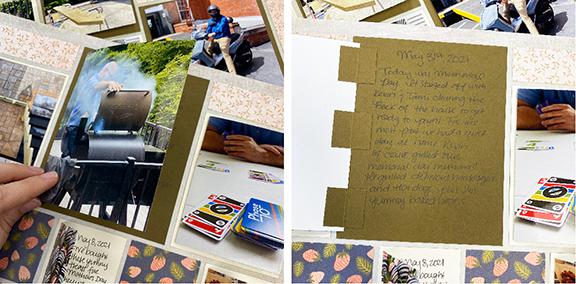
On her May layout, Paije wanted to show a variety of activities; so, she created hidden journaling spots, using flaps, to allow extra space for journaling.
It's easy to make the flaps. Just cut one - three 1x1" squares for each block you want to add journaling. Fold the squares in half and add glue to both sides. Place the folded squares along the edge of the photo and then line up photo over paper mat. The other side of the folds should be glued down on the mat
and you are done!
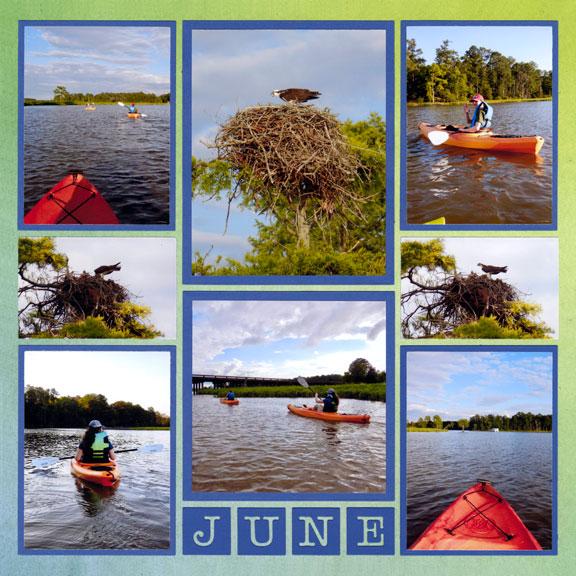
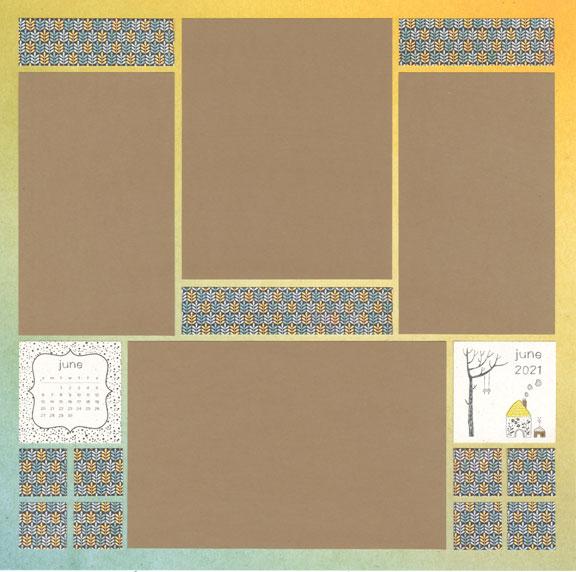
Here is an example of a page you can make with June's Freebies!
When you place an order with us at snapncrop.com in June you receive these free 2x2 squares of art that fit on the grid. It is a great way to journal and scrapbook at the same time!
I am so glad you have decided to join Mosaic Moments on your scrapbooking journey!
These quick and easy ideas will help you start making beautiful pages. I hope you will ask questions or help with quick page ideas and tips (see below to know how).
Happy Scrapping!
Mosaic Moments
Join the Conversation on Share Tips & Ideas:
Mosaic Moments
Join ourShare Tips & Ideas: Mosaic Moments Facebook Group. This is the place to ask questions that relate to the Mosaic Moments Page Design System and share your experience
using the system and products with others.
In this group you'll find suggestions that relate to Mosaic Moments customer preferences on topics such as: die machines, adhesives, organizers, printers, etc.
Find answers to your questions in the group by typing the subject (example: die machines) in the "search box". If nothing comes up from the search, add a post to ask your question. ALL questions must be related to the Mosaic Moments System/Products. (Non-related questions will be deleted without notice.)
This group is not for order comments/questions or issues, or for Snapncrop.com product stock questions. All questions regarding Snapncrop.com (orders, inventory, etc.) should be directed to our amazing customer service team.
Please note:Reading and agreeing to the group rules is required before access to this private group.