YES, EVERYTHING is on SALE! But, before you shop, be sure to take a look at the great ideas included in this weeks SnapFix. We've had so many of you ask, "How do I use the Layering Ribbon Border Dies?" We are pretty sure you are going to love our answers. Start with our "How To"
below, and don't forget to scroll down to Candy's video and Andrea's Article for more great ideas.
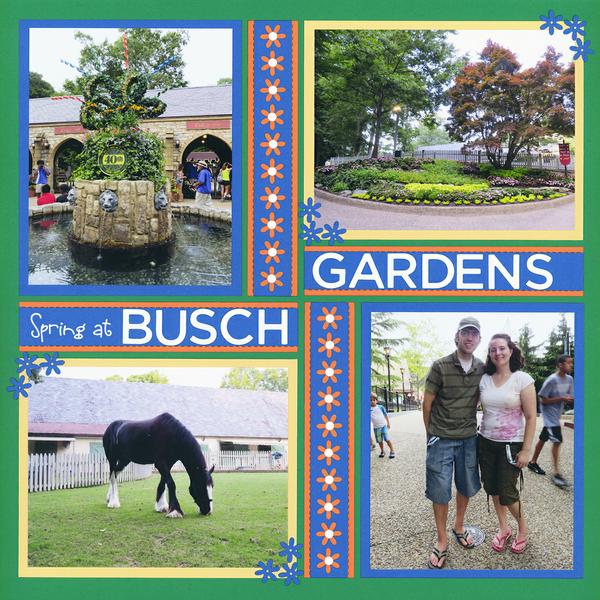
How to layer with the Layering
Ribbon Border Die Set
The Layering Ribbon Border Die set comes with three strips. The 1x5 Ribbon Layer with stitch lines, and two layering strips (Daisy and Dots.) Here is how we used them on the page above:
Directions from bottom layers to top layers:
1. 1x5 ribbon die - cut in orange (x4).
2. Flower layering die cut in blue and layered on top (x2 see Vertical strips)
AND 1x5 ribbon die cut in blue (x2 see horizontal strips) cut at stitch marks and remove edge to show orange beneath.
3. Dot layer cut in white (x2). Use the dots to create center of flowers.
4. Title letters (Busch Gardens) cut using Alphabet Die 2 set. (A perfect fit on the layering ribbon die set. - Use the stitch lines to easily align letters.)
5. Use
the blue flowers, left over from the blue flower layer cuts, to embellish photo corners.
From
Palm Trees to Pockets, Grid Paper and Tools, EVERYTHING is on SALE this week at Snapncrop.com.
Do you want to Simplify Scrapbooking your Summer
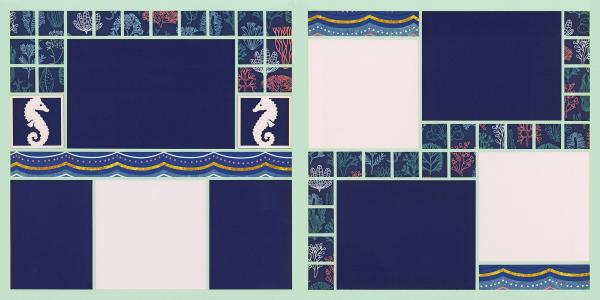
Memories? When I want to make a page that looks like I spent hours - but really just took minutes to put together, I grab a Mosaic Moments Page kit. This week we are introducing brand new kits -
NEW Under The Sea Kit (shown
above)
OVER 35 NEW PAGE
KITS!
Come take a look at over 35 brand new kits - even if you
like designing your own pages, Mosaic Moments Page Kits are great design inspiration.
Every Mosaic Moments Page kit comes with two sheets of 12x12 grid paper and patterned paper, card stock, and embellishments laser cut for layering to perfectly fit the grid.